
How to Match an HDRI with a Backplate for Photoreal CG Integration
- A backplate is the photo the camera sees; the HDRI from the same spot supplies light and reflections from all directions.
- HDRI Hub sells 41 backplate sets that combine plates with the HDRI of the same location, plus 33 HDRI domes.
- All HDRI Hub backplate images are processed linear with industry standard white balance and colour space.
- HDR 142 Rural Road pairs an unclipped 8192 x 4096 OpenEXR HDRI (23.6 EV) with 15 backplates.
- The core rule: light and reflect with the HDRI, show the plate only to the camera, and catch shadows on an invisible ground plane.
The classic car-ad shot, a CG car on a real road, only works when camera, light and reflections agree with the photo. A backplate is the high-resolution photo the viewer sees. An HDRI shot at the same spot and time lights the car and fills its reflections, including everything behind the camera. Andreas Reimer captures both together on location, so sun direction, sky and colour already match. Below: a renderer-independent workflow, setup steps for V-Ray, Corona and Blender Cycles, and a checklist of the mismatches that give CG away.
What a backplate is, and why it needs a matching HDRI
A backplate is a high-resolution still photo that the camera sees as the background of a render. An HDRI is a 360 degree high dynamic range panorama that lights the 3D object and fills its reflections. In a CG integration shot the two do different jobs, and both are needed.
Two files, two jobs
- The backplate is what the viewer sees. It is a normal photo taken through a real lens, with real perspective, focus and framing. It has far more pixels across the frame than any crop of a panorama.
- The HDRI is what the object sees. It stores light from every direction, including everything behind the camera that the plate never shows. A car body reflects the road behind the photographer, and only the HDRI contains that road.
An HDRI crop as background gets soft at long lenses. A flat plate cannot light the scene, because it does not show where the sun is or what lies behind the camera.
Why the pair must come from the same place and time
An HDRI shot an hour after the plate has a different sun angle, colour temperature and clouds. The CG shadow then disagrees with the shadows in the photo, and the reflections show a sky that is not in the picture. A pair captured together removes these problems: sun direction, sky brightness, colour and reflected surroundings already agree.
That is how the backplate sets on HDRI Hub are built. Andreas Reimer shoots the HDRI and its plates on location, and each set combines the plates with the corresponding high resolution HDRI of that spot. All backplate images are processed linear with industry standard white balance and colour space, so they sit close to what a renderer produces without a colour correction pass.
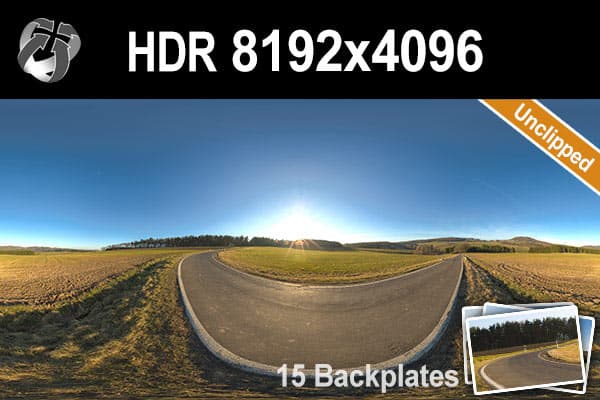
The panorama above is HDR 142 Rural Road: an unclipped 8192 x 4096 OpenEXR HDRI with a 23.6 EV range, plus 15 JPG backplates of the same road.
What you need before you start
- A backplate and an HDRI from the same location and session, for example a set from Sets / Bundles.
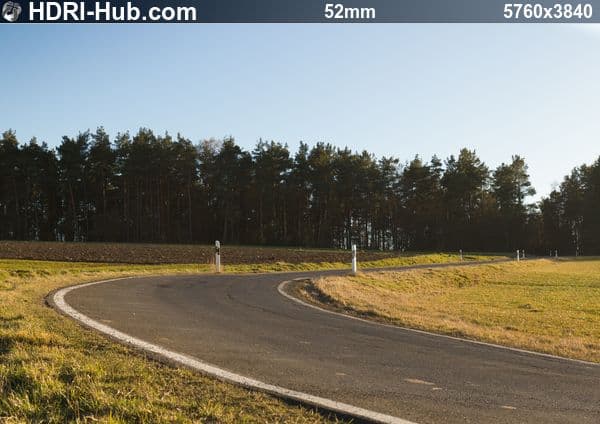
- The focal length of the plate. On sets like HDR 142 and HDR 147 the plate previews on the product page show the focal length and pixel size of each plate.
- A 3D model at real-world scale. A car modelled in centimetres but treated as metres breaks perspective at once.
- A renderer with three features: an environment or dome light for the HDRI, a separate background slot for the plate, and a shadow catcher or matte material for the ground.
Step-by-step workflow (works in any renderer)
1. Set the render size to the plate size
Use the exact pixel dimensions of the backplate, or at least its aspect ratio. A different aspect ratio crops or stretches the plate and breaks every later step.
2. Match the camera
Enter the plate's focal length and set the sensor or film width to the real camera's sensor. A focal length means nothing without a sensor size: 52 mm on a 36 mm wide full frame sensor shows a different field of view than on a smaller sensor.
The horizon line in a photo passes through every object at the height of the lens: if it cuts a parked car at its door handles, the camera stood at door handle height. For an exact solve, use a camera matching tool. 3ds Max has the Camera Match utility, which needs at least five reference points whose real distances you know and which do not all lie on one plane. For Blender, the free open source tool fSpy solves a camera from vanishing lines in a single photo and has an importer add-on.
If the plate was shot with a shift lens, use lens shift in the 3D camera instead of tilting it.
3. Put the ground and the horizon in the right place
Model a ground plane at road level, tilted to the slope of the road if needed. Then check the horizon with the classic VFX pair: a mirror sphere and a grey sphere where the object will stand. The mirror sphere shows whether horizon and surroundings land in the right place; the grey sphere shows direction and softness of the light.
4. Rotate the HDRI to match the plate
Turn the HDRI around the vertical axis until the sun and large landmarks line up with the plate. Use three checks:
- The CG shadow points the same way as the shadows of real poles, trees or kerbs in the plate.
- The mirror sphere shows the road and the trees where the plate puts them.
- A landmark visible in the plate, such as a building edge or a gap in a tree line, appears at the same angle in the panorama.
5. Light with the HDRI, show the plate
This is the core rule. The HDRI drives lighting and reflections. The backplate is only the camera-visible background, mapped flat to the screen, not wrapped around a sphere. Never light with the plate, and never show the HDRI to the camera.
6. Catch shadows and reflections on the ground
The CG object needs an invisible floor that receives shadows: a shadow catcher, also called a matte material. It shows the plate and darkens it where the object casts a shadow. On a wet road or polished floor, enable reflections on the catcher too. The contact shadow under tyres or a product base is the most important detail; without it the object floats.
7. Match exposure, colour and lens
Start with a neutral white balance in the render camera, since the plates are already balanced. Then compare render and photo:
- Exposure: no CG highlight brighter than the brightest highlight in the plate.
- Black levels: the darkest CG shadow about as deep as the darkest shadow in the photo.
- Lens and grain: add the plate's depth of field, softness and sensor grain to the CG in post.
Setup in V-Ray 7 for 3ds Max
The basic Dome Light setup is covered on HDRI for V-Ray. For a backplate shot, change the following:
- Load the HDRI into a V-Ray Dome Light and enable Lock texture to icon, so rotating the light icon rotates the HDRI.
- Enable Invisible on the Dome Light so the camera does not see the dome directly.
- Put the backplate into the 3ds Max Environment Map slot (Environment and Effects) as a bitmap with screen mapping, so it stays flat behind the camera view. Do not use spherical mapping for a plate.
- Make the ground plane a shadow catcher. Either right-click it, open V-Ray properties and enable Matte object, Matte for refl/refr, Shadows and Affect alpha with Alpha contribution at -1.0, or apply a VRayMtlWrapper with the same options. The V-Ray toolbar also has a button that makes a V-Ray shadow catcher with these settings in one click.
- If reflections of the matte ground look wrong in the car paint, use Secondary matte environment in Render Setup > V-Ray > Environment to control what matte objects show in reflections and refractions.
- Remove any V-Ray Sun or Sky. With an unclipped HDRI the sun is already in the dome, and a second sun doubles the key light.
Chaos notes that since V-Ray 6, matte objects show the Dome Light texture instead of the background when a Dome Light is in the scene. If the ground shows the HDRI instead of the plate, keep the alpha settings above and composite over the plate in post: the negative alpha contribution puts the shadows into the alpha channel.
Setup in Corona for 3ds Max
Corona splits lighting and background in one rollout, and its Shadow Catcher material handles shadows and reflections on the plate. The steps below follow the current Chaos documentation for Corona for 3ds Max; Corona 15 is the current release. For the basic HDRI load, see HDRI for Corona Renderer.
Environment: HDRI for light, plate for the camera
- Open Render Setup > Scene > Scene Environment and choose Single map. Load the HDRI there in a CoronaBitmap with Environment mode set to Spherical.
- Rotate the HDRI with the CoronaBitmap's Rotation [deg] value until shadows and reflections match the plate.
- In the Overrides section of the same rollout, enable Direct visibility override and load the backplate in a second CoronaBitmap with Environment mode set to Screen. Screen mode maps the bitmap parallel to the camera sensor, which is what a plate needs.
- Leave Reflections override and Refractions override off. Reflections then come from the 360 degree HDRI, not from the flat plate.
- For crisp sun shadows from an unclipped HDRI, enable Accurate sampling (slower) in the Scene Environment rollout. Chaos describes it as sharpening shadows from small bright sources such as the sun.
Ground: the Corona Shadow Catcher material
- Create a plane at road level under the object and assign the Corona Shadow Catcher material.
- Load the backplate into the Matte/Shadow Enviro/Backplate slot. Use the same CoronaBitmap as the direct visibility override, in Screen mode.
- Set Projection mode to the option that corresponds to a simple backplate. The documentation says this setting must match the backplate type for the shadow catcher to appear correctly in reflections on the object.
- Adjust Shadow amount until the CG shadow is as dark as real shadows in the plate. Higher values give darker shadows.
- For a wet road or shiny floor, raise the reflection Level and set Glossiness below 1 for a blurred reflection. Fresnel IOR controls how strongly the reflection rises at grazing angles.
- Enable Use enviro for off-screen rays, so rays that leave the plate's frame see the HDRI instead of a stretched plate.
To composite in post instead, set Alpha mode to For compositing. The catcher then renders black for direct rays, and the directly visible environment must be overridden to black as well.
Added lights on a night plate
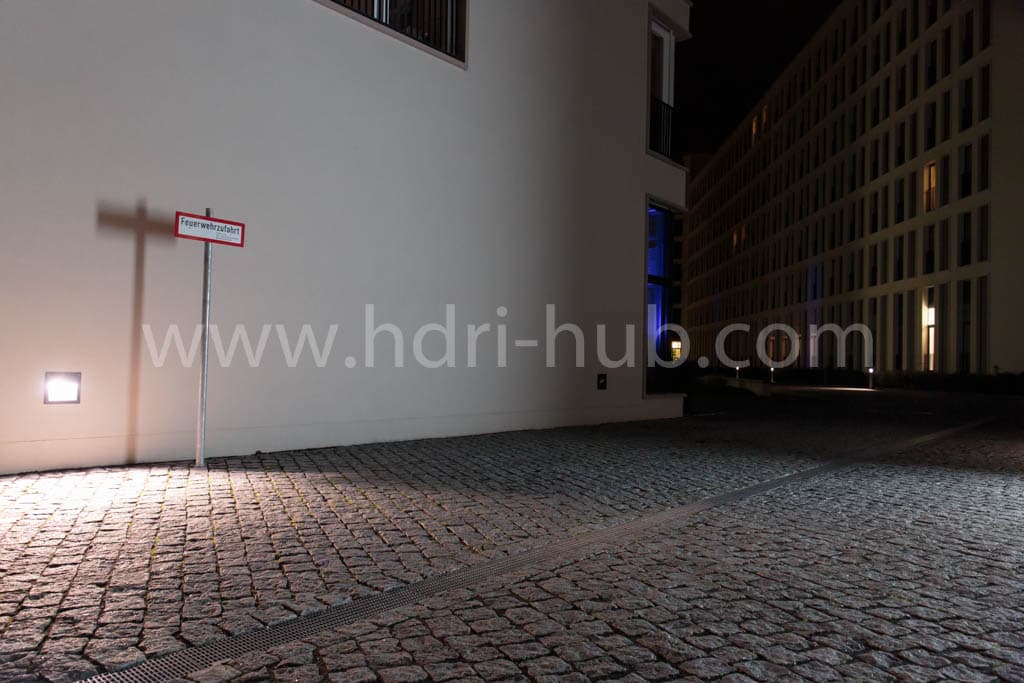
Headlights or a lamp that is not in the photo should brighten the ground. Enable Shadowcatcher illuminator on that Corona Light or Corona Light Material, and it lights the shadow catcher instead of casting shadows on it.
Setup in Blender Cycles
The World setup with an Environment Texture and a Mapping node for rotation is explained in HDRI for Blender. For a backplate shot in Blender 5.2 LTS:
- Use Cycles; the Shadow Catcher option is a Cycles setting.
- Load the HDRI in the World and rotate it with the Mapping node's Z rotation until the shadow matches the plate.
- In the camera's properties, add the plate under Background Images. This shows the plate in the camera view for matching, but it does not render.
- Set the camera's Sensor Fit and sensor width to the real camera, and the focal length to the plate's value. fSpy can set all of this for you.
- Select the ground plane and enable Shadow Catcher under Object Properties > Visibility > Mask. The object then only receives shadow rays.
- In Render Properties > Film, enable Transparent, so the World renders transparent and the CG can be laid over the plate.
- In the View Layer passes, enable the Shadow Catcher pass. The manual notes that with the pass on, all indirect light interactions are captured; without it a simpler approximation is used.
- Composite in the Compositor: load the plate with an Image node, multiply it by the shadow catcher pass, and put the render on top with an Alpha Over node.
Mismatches that give CG away
| Mismatch | How to spot it | Fix |
|---|---|---|
| Shadow direction | CG shadow points another way than shadows of poles or trees in the plate | Rotate the HDRI until both agree |
| Shadow softness | CG shadow is blurry while the photo has hard shadows | Use an unclipped HDRI so the sun keeps its real brightness |
| Horizon in reflections | Horizon line in the car paint sits higher or lower than in the plate | Fix camera height, then check with a mirror sphere |
| Perspective | Object looks too big, too small or distorted | Match focal length and sensor width, check model scale |
| Floating object | No dark line where tyres or base touch the ground | Add a shadow catcher; check contact shadows at full size |
| White balance | CG reads bluer or warmer than the photo | Neutral camera white balance; HDRI and plate from one session |
| Exposure | CG highlights brighter than any highlight in the photo | Lower exposure until the brightest CG highlight matches the plate |
| Clean CG on a noisy photo | Render is sharper and cleaner than the plate | Add depth of field, slight softness and matching grain in post |
Choosing a backplate and HDRI pair
- Location first. The sets cover rural roads, forests, city streets, parking lots, a tunnel, an old factory, a garage and a harbour. For HDRIs alone, browse road HDRIs and parking lot HDRIs.
- Light second. A low sun in a clear sky gives long, hard shadows; an overcast sky gives soft, even light for product and design shots.
- Several plates per HDRI. HDR 142 has 15 plates, HDR 147 has 14, HDR 138 has 11: enough camera angles under one light for a campaign series.
- Resolution. The plate sets background sharpness, so an 8K HDRI is enough for most car shots. See the HDRI resolution guide.
- Night. Night sets such as HDR 138 City Night Place put the real street lights into the reflections.
- Animation. Plates are stills. For a moving camera, show the full panorama instead, or project a ground-level HDRI from HDRI Domes onto a ground plane with the renderer's dome projection: Finite dome on the V-Ray Dome Light, Dome mode in the CoronaBitmap.
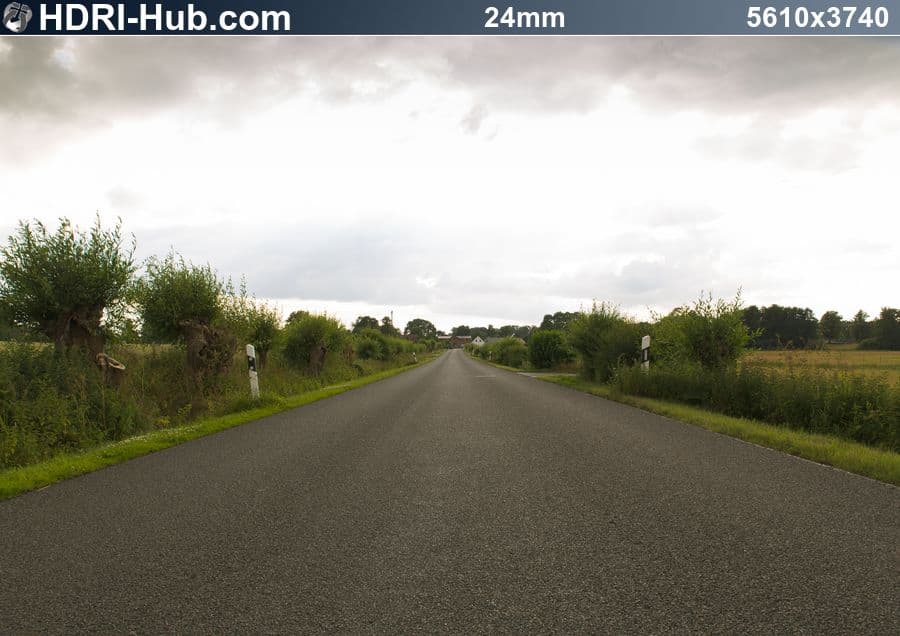
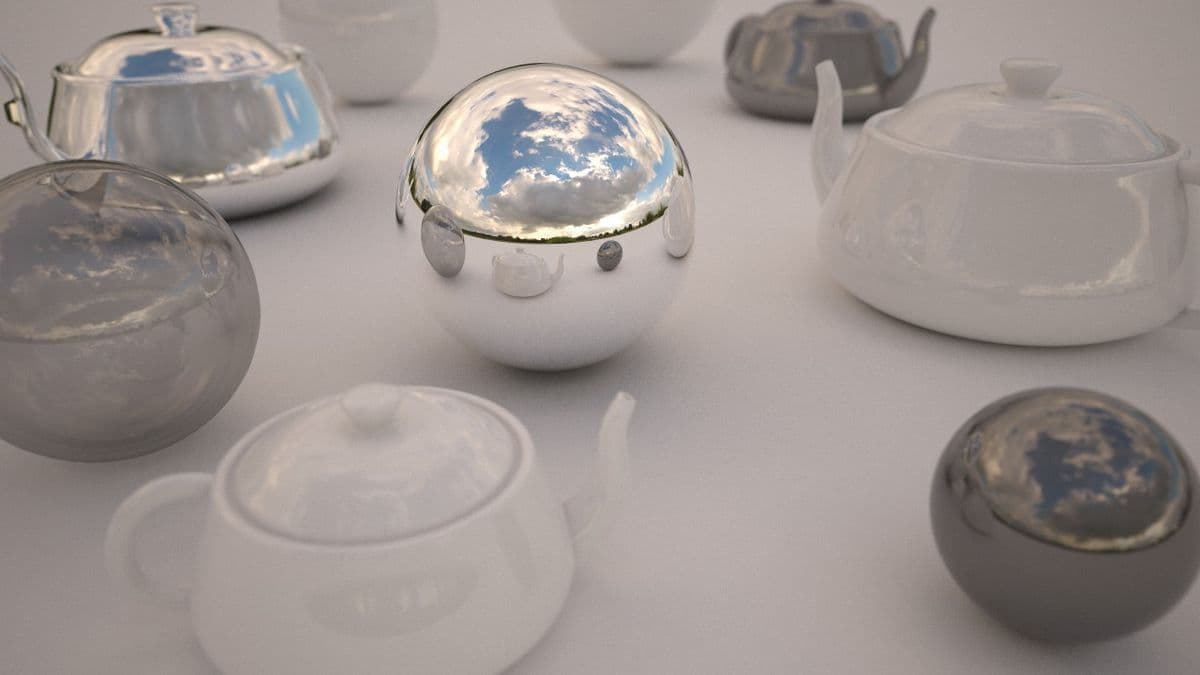
The overcast plate above belongs to HDR 147 Rural Road with Cloudy Sky: an unclipped 8192 x 4096 OpenEXR HDRI with a 14.06 EV range and 14 JPG plates. The test render below shows its HDRI on chrome spheres, the same check as step 3.
What is in the backplate section
| Category | Products | What you get |
|---|---|---|
| Sets / Bundles | 41 | Backplates plus the full panorama of the same spot |
| HDRI Domes | 33 | HDRIs for car and product renders, including the Above the Clouds series and ground-level locations |
| Layout / Private Use | 14 | Plate sets for layout and private use |
Sets from HDR 142 onwards ship the HDRI as OpenEXR; many older sets ship it as Radiance .hdr inside an sIBL collection. The plates are JPG, and several sets also include raw or EXR plate files. Eleven sets carry the unclipped tag: HDR 142, 143, 144, 145, 147, 148, 163 and the two-part 167 and 168 sets. The sets carry the same licence as all HDRI Hub files: commercial use, one user, one workstation.
Browse all backplates, pick a backplate set with its matching HDRI, or test the workflow first with a free HDRI. For the sun side of the topic, read unclipped HDRIs, sun and shadows; for the Blender World setup in depth, see how to light a scene with an HDRI in Blender.
Frequently asked questions
What is a backplate in 3D rendering?
A high-resolution photo used as the visible background of a render. The CG object is rendered or composited on top, and an HDRI from the same location lights it so light and reflections match the photo.
Do I need both an HDRI and a backplate?
For photo integration, yes. The backplate is what the camera sees. The HDRI supplies light and reflections from all directions, including the area behind the camera that the plate does not show.
How do I match the 3D camera to a backplate?
Set the render size to the plate size, enter the plate's focal length and the real sensor width, and place the camera at the height where the horizon line crosses objects in the photo. For an exact solve use the Camera Match utility in 3ds Max or fSpy for Blender.
Why don't my reflections match the backplate?
Usually the object reflects the flat plate instead of the HDRI, or the HDRI is not rotated to the plate. Keep the plate in the background slot only and rotate the HDRI until a mirror sphere shows the scene where the photo has it.
How do I get the CG shadow onto the photo?
Make a ground plane under the object a shadow catcher: the Corona Shadow Catcher material, a V-Ray matte object with Shadows and Affect alpha, or the Shadow Catcher option in Blender Cycles. It stays invisible but darkens the plate where the shadow falls.
Can I use any HDRI with any backplate?
Only roughly. A random HDRI has a different sun direction, colour and sky than the photo, and the mismatch shows in shadows and reflections. An HDRI shot at the same spot and time as the plate removes those differences.
Which HDRI resolution do I need with a backplate?
The plate provides the visible background, so the HDRI only lights and reflects. 8192 x 4096 is enough for most shots. Larger HDRIs help only when sharp, mirror-like reflections fill a large part of the frame.
Are HDRI Hub backplates linear?
Yes. All HDRI Hub backplate images are processed linear with industry standard white balance and colour space, so they sit close to a render's output without colour correction.
Sources
- Chaos Docs: Corona Shadow Catcher Material (Corona for 3ds Max)
- Chaos Docs: Scene Tab, Scene Environment and Overrides (Corona for 3ds Max)
- Chaos Docs: Corona Bitmap, environment mapping modes (Corona for 3ds Max)
- Chaos Docs: V-Ray Shadow Catcher (V-Ray for 3ds Max)
- Chaos Docs: Dome Light (V-Ray for 3ds Max)
- Chaos Docs: Environment Settings (V-Ray for 3ds Max)
- Blender 5.2 LTS Manual: Cycles object visibility, Shadow Catcher
- Blender 5.2 LTS Manual: Film, Transparent
- fSpy: open source still image camera matching