
How to light a scene with an HDRI in Blender (Cycles and EEVEE)
- In Blender an HDRI is loaded through an Environment Texture node in the World shader, not through an Image Texture node.
- Rotation Z on a Mapping node in front of the Environment Texture sets the direction of the HDRI sun.
- Background Strength scales all light from the HDRI; Color Management Exposure changes brightness in stops like a camera, and AgX has been the default view transform since Blender 4.0.
- Cycles traces sun shadows directly from the HDRI; EEVEE since Blender 4.2 extracts a sun light from the World above a Threshold value.
- Lighting quality does not depend on HDRI resolution; a visible sky needs roughly render width x 360 / horizontal field of view pixels.
- 34 outdoor HDRIs on HDRI Hub keep an unclipped sun, which casts a defined shadow in Cycles without an extra Sun lamp.
One HDRI file replaces a whole light rig in Blender: sky light, sun, bounce colour and reflections, all recorded at a real place. This guide covers the parts the short tutorials skip: aiming the sun, setting brightness with exposure instead of Strength, getting sun shadows in both Cycles and EEVEE, hiding or replacing the background, and picking a sky that fits the scene. Every step was checked against the Blender 5.2 LTS manual, and you can follow along with one of the free HDRIs for Blender.
What an HDRI does in a Blender scene
An HDRI is a 360 degree panorama that stores real light values. The sun can be thousands of times brighter than the sky next to it, and the file keeps that difference. An 8-bit JPG panorama clips everything at white and gives flat light without a defined shadow.
Blender wraps the panorama around the scene as the World. The World is treated as infinitely far away and only sends light into the scene. The HDRI does three jobs at once: diffuse light with a direction and colour, reflections in glass, metal and paint, and the visible background. And it has no parallax: the ground in the panorama does not touch your model, so you still need a floor object or a shadow catcher.
An HDRI is the right tool for exterior arch-viz, product shots, vehicles and look development. It is a partial solution for interiors lit mainly through windows and for night scenes full of practical lights, where you add lights of your own.
Set up the World in Blender 5.2 LTS
The quick path runs through the Properties editor:
- Open the World tab. If the scene has no World, create one.
- In the Surface panel, click the small socket button next to Color and choose Environment Texture. Do not use Image Texture: it maps the panorama like a flat image and the sky looks stretched.
- Click Open and pick the .exr or .hdr file.
- Switch the viewport to Rendered shading to see the result.
For control, open the Shading workspace and set the Shader Editor from Object to World. The chain is Environment Texture (Color) into Background (Color) into World Output (Surface). Dragging an image file into the Shader Editor while it shows the World creates an Environment Texture node directly. Leave Projection on Equirectangular; Mirror Ball is only for photos of a chrome ball. Leave the colour space on the linear default Blender assigns to .exr and .hdr files and never switch it to sRGB, which is meant for 8-bit images.
Both formats work. HDRI Hub skies from HDR 142 onwards ship as OpenEXR, earlier skies and the sIBL sets as Radiance .hdr. Blender reads both natively; the differences are file size and precision, explained in .hdr or .exr.
Rotate the HDRI to aim the sun
Rotation decides where the sun comes from, so it is the most important setting after loading the file.
- Add a Texture Coordinate node and a Mapping node in front of the Environment Texture.
- Connect the Texture Coordinate node's Generated output to the Mapping node's Vector input, and the Mapping node's Vector output to the Environment Texture's Vector input.
- Change Rotation Z on the Mapping node to spin the sky around the scene. Use X and Y only to level a tilted horizon.
With the bundled Node Wrangler add-on enabled in Preferences, select the Environment Texture node and press Ctrl+T; it adds the Texture Coordinate and Mapping nodes for you.
Set the camera first, then rotate the sky. Sun directly behind the camera gives flat light and short, hidden shadows. Sun at 30 to 60 degrees to the side shows the form of a building or product. Sun slightly behind the subject adds rim light and long shadows towards the camera, which reads as depth.
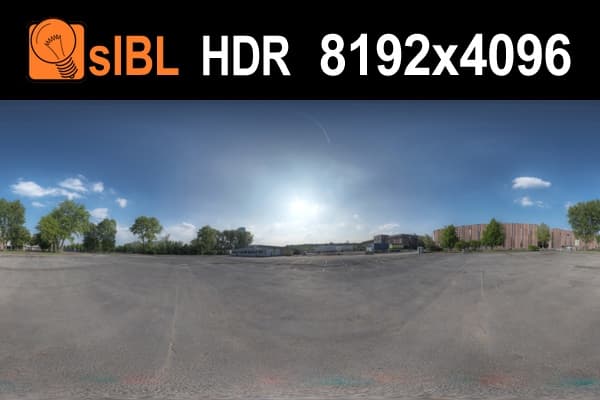
The free HDR 111 Parking Lot has a clear sky and an obvious sun, so you can follow every step of this page with it and see the shadow swing as you change Rotation Z.
Strength vs exposure: getting the brightness right
Two controls change brightness, and they do different things.
Strength on the Background node multiplies all light from the HDRI: sky, sun and reflections together. 1.0 is the brightness stored in the file, so start there. Lower it when the HDRI only serves as fill next to a Sun lamp or area lights. Setting Strength to 5 or 10 to fix a dark render usually hides an exposure problem.
Exposure in Render Properties under Color Management works like a camera. It is measured in stops: each +1 doubles the image brightness. It changes how the result is displayed, not how much light exists, so the balance between sun, sky and your own lights stays intact.
The View Transform decides how bright values are mapped to the screen. AgX replaced Filmic as the default for new files in Blender 4.0. It rolls bright areas off gradually and desaturates very bright colours like film, so a sunlit facade and a bright sky survive in the same frame. Standard does no tone mapping and clips HDRI skies harshly; keep it for non-photorealistic work.
A correctly captured midday HDRI and an overcast HDRI do not have the same brightness, and that is physically right. Keep Strength at 1.0 and set Exposure per sky, like a photographer. The separate Exposure value in the Cycles Film panel scales the render data itself, which matters for linear EXR output.
Sun and shadows: Cycles vs EEVEE
Cycles: shadows come from the file
Cycles path-traces the World, so an HDRI with a bright sun disc casts a sharp, correctly coloured sun shadow on its own. The condition is that the sun pixels keep their real intensity. If the sun was clipped during capture or processing, it is only a little brighter than the clouds around it, and the shadow turns soft and weak. That is the usual reason people add a Sun lamp. HDRI Hub tags 34 outdoor skies as unclipped; they light a Cycles scene with a defined shadow and no extra lamp. Unclipped HDRIs and sun shadows explains the difference in detail.
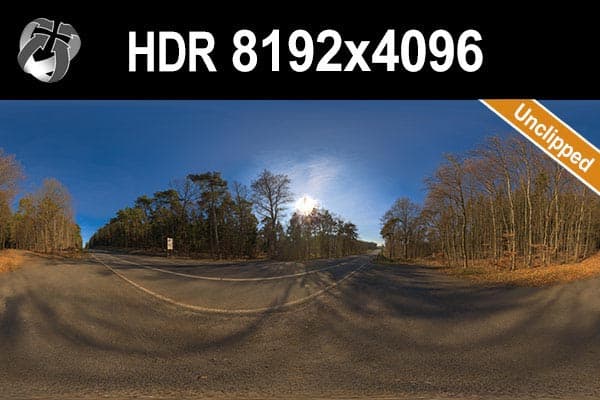
HDR 145 Rural Road Clear Sky is one of the unclipped skies: a clear sky and a strong sun that casts hard shadows in Cycles.
In the World tab under Settings, keep Sampling on Auto. That enables multiple importance sampling, which sends more samples towards bright areas such as the sun and cuts noise. Map Resolution sets the detail of that importance map; raise it for very high resolution skies with a small sun.
EEVEE: sun extraction since Blender 4.2
EEVEE stores World lighting in an internal light probe, which is less precise than Cycles; a tiny, very bright sun gets smeared into general brightness. Since the EEVEE rewrite in Blender 4.2, the World tab has a Sun section that fixes this:
- Threshold: brightness above this value is taken out of the World probe and turned into a real sun light. Zero disables extraction.
- Angle: the angular diameter of the extracted sun. The real sun is about half a degree; larger values soften the shadow.
- Shadow: enables shadow casting for the extracted sun, with the same shadow options as a Sun lamp.
Raise the threshold if large bright patches of sky are being extracted; lower it if no sun shadow appears. Extraction works best with an unclipped sun, because the sun then stands far above the sky brightness. A clipped sun barely exceeds the threshold and produces a faint shadow. Files saved before 4.2 open with the World sun shadow switched off to keep their old look, which is the most common reason an HDRI casts no shadow in EEVEE. For reflections, enable Raytracing in Render Properties; without it EEVEE falls back to pre-filtered light probes.
| Cycles | EEVEE (4.2+) | |
|---|---|---|
| Sun shadow source | Traced from the HDRI sun pixels | Extracted sun light above the Threshold |
| Needs | A bright, ideally unclipped sun | Threshold above zero and Shadow enabled |
| Shadow softness | Size of the sun disc in the file | Angle value of the extracted sun |
| Noise control | Sampling Auto, Map Resolution | No sampling noise, probe resolution |
| Best for | Final stills, glass and reflections | Fast previews, animations |
HDRI plus a Sun lamp
Add a Sun lamp when the HDRI sun is clipped, when you want sunlight from an overcast sky, or when the shadow direction must be art-directed. Rotate the HDRI so its brightest area points the same way as the lamp, give the lamp a warm colour for low sun, and lower HDRI Strength so the sky acts as fill. If the directions disagree you get two shadows and a sun highlight in chrome that does not match the lit side.
Show the HDRI or use only its light
Transparent background
In Render Properties, enable Transparent in the Film panel. The HDRI still lights and reflects, but the background renders as alpha. Save as PNG or EXR and composite later. In Cycles, give the floor object the Shadow Catcher option under Object Properties, Visibility, so the shadows survive on a transparent ground.
Hide the sky from the camera only
In Cycles, the World tab has a Ray Visibility panel. Turning off camera visibility removes the sky from the frame while light and reflections stay. A method that works in Cycles and EEVEE uses a Light Path node: feed its Is Camera Ray output into the Factor of a Mix node, put the lighting HDRI in the first colour input and a plain colour or another image in the second, and send the result to the Background node.
A different background than the light
The same Mix setup lets one HDRI light the scene and another image fill the frame. A common use is a low resolution copy for lighting and a high resolution file for the visible sky. The better option for exterior and car renders is a photographic backplate shot at the same place and time as the HDRI, so sun direction and colour already match. HDRI Hub sells sets like the HDR 145 Rural Road Clear Sky Plates for exactly this. Render with a transparent film and a shadow catcher, rotate the HDRI to match the sun in the plate, and composite. How to match an HDRI and a backplate covers camera height, lens and sun alignment.
Choosing the right HDRI for the scene
Exterior arch-viz and products
A sunny sky with an unclipped sun gives defined shadows and strong form. An overcast sky gives soft, even light that suits product catalogues and facades where hard shadows would hide detail. Time of day changes colour and shadow length: midday is short and neutral, late afternoon warm and long, dusk blue with a bright band at the horizon. Match the surroundings too, because a glass facade reflects whatever is in the panorama: a rural road looks wrong in a city tower.
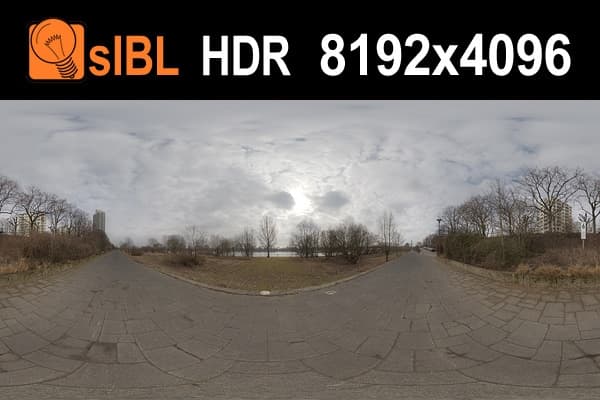
The free HDR 112 River Road is a good overcast test sky. Swap it with the sunny Parking Lot file on the same scene to see how much the sky alone changes the mood.
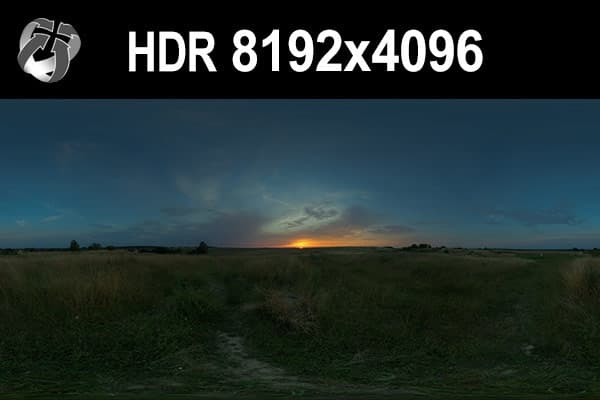
For evening shots with lit interiors, a dusk sky such as HDR 158 Blue Evening Sky keeps the windows the brightest part of the frame.
Interiors
In an interior the HDRI enters through windows, so the sky region matters more than the ground. Expect to raise Exposure well above an exterior shot. In Cycles, place area lights in the window openings and enable their Portal option; portals help Cycles find the light coming in and reduce noise in interiors, though they do not help outdoors. In EEVEE, use sun extraction for the sun patches on the floor and bake a volume light probe for bounce light. If the view out of the window will be a separate backplate, choose a sky with little ground detail.
Resolution: lighting vs visible background
Lighting quality does not depend on resolution. A 4K to 8K file lights a scene as well as a 20K file. Resolution matters when the sky is visible in the frame or in sharp reflections. A useful rule: needed HDRI width = render width x 360 / horizontal field of view. A 1920 pixel render at a 40 degree field of view needs about 17,000 pixels across the panorama for a sharp sky, which points to a 16K or 20000x10000 file. The HDRI resolution guide has more examples and file sizes.
Large files cost memory, so lay out with a small copy and swap to full resolution for the final render.
Troubleshooting
| Problem | Likely cause | Fix |
|---|---|---|
| HDRI not visible in the viewport | Material Preview uses a built-in studio HDRI | Enable Scene World in the viewport shading options or switch to Rendered |
| Sky looks stretched or smeared | Image Texture node instead of Environment Texture | Replace it with an Environment Texture node |
| Render too dark or too bright | Exposure not set for this sky | Adjust Color Management Exposure, keep Strength near 1.0 |
| No sun shadow in EEVEE | Threshold at zero or sun shadow off, common in pre-4.2 files | Set a Threshold and enable Shadow in the World Sun settings |
| Soft, weak sun shadow in Cycles | Clipped sun in the HDRI | Use an unclipped HDRI or add a matched Sun lamp |
| Noise and fireflies | World sampling off or importance map too coarse | Set Sampling to Auto, raise Map Resolution, use the denoiser |
| Washed-out or blown colours | sRGB colour space on the HDRI or Standard view | Use the linear default and the AgX view transform |
| Blurry visible sky | Panorama too small for the camera | Use 16K or 20K, or a separate background image |
Frequently asked questions
How do I add an HDRI in Blender?
Open the World tab in the Properties editor, click the socket button next to Surface Color, choose Environment Texture and open the .exr or .hdr file. Switch the viewport to Rendered shading to see the HDRI light the scene.
How do I rotate an HDRI in Blender?
Connect a Texture Coordinate node (Generated) through a Mapping node into the Environment Texture's Vector input and change Rotation Z on the Mapping node. With Node Wrangler enabled, Ctrl+T on the Environment Texture node adds both nodes.
Why does my HDRI not cast shadows in EEVEE?
EEVEE needs sun extraction: in the World tab's Sun settings, set Threshold above zero and enable Shadow. Files from before Blender 4.2 open with this shadow disabled. Extraction works best when the HDRI has a bright, unclipped sun.
Can I use an HDRI only for lighting and not as background?
Yes. Enable Transparent in the Film panel to render the background as alpha, or in Cycles turn off camera visibility in the World's Ray Visibility panel. A Light Path node with Is Camera Ray driving a Mix node shows a different background while the HDRI still lights the scene.
What resolution HDRI do I need for Blender?
For lighting only, 4K to 8K is enough. When the sky is visible, divide 360 by the horizontal field of view and multiply by the render width; a 1920 pixel render at 40 degrees needs about 17,000 pixels, so a 16K or 20K file.
Should I use an HDRI or the Sky Texture?
The Sky Texture node is procedural, clean and has an adjustable sun, but no clouds or real surroundings. An HDRI adds real clouds, ground colour and reflections of a real place. Many artists combine an HDRI for reflections with a Sun lamp for art-directed shadows.
Can I use free HDRIs commercially?
The 11 free HDRIs on HDRI Hub carry the same licence as the paid files: commercial use for one user and one workstation. Other sources have their own terms, so check each licence.
Try it with a free HDRI
Download one of the free HDRIs for Blender: 11 files up to 8192x4096, licensed for commercial use, enough to test every step above. When the sky needs to be visible or the sun needs a crisp shadow, the HDRI environments for Blender include 161 outdoor skies up to 20000x10000, 34 of them with an unclipped sun.
Sources
- Blender 5.2 LTS Manual: World Environment
- Blender 5.2 LTS Manual: Environment Texture Node
- Blender 5.2 LTS Manual: EEVEE World Settings
- Blender 5.2 LTS Manual: Cycles World Settings
- Blender 5.2 LTS Manual: Displays and Views
- Blender 5.2 LTS Manual: Node Wrangler
- Blender 4.2 LTS Release Notes: EEVEE migration
- Blender 4.0 Release Notes: Color Management